This was definitely a “think outside of the box” moment for me. Transformations are difficult to understand in the beginning for many students, sighted and visually impaired alike. Making it hands-on simplifies it a bit and builds the foundation of understanding for students. Before you try to incorporate higher level technology for graphing, it is important first to teach the foundational concepts using graphics and tactile materials.
What are Transformations?
The different transformations when graphing are:
- Rotation: Rotating an object about a fixed point without changing its size or shape
- Translation: Moving an object in space without changing its size, shape or orientation
- Dilation: Expanding or contracting an object without changing its shape or orientation
- Reflection: Flipping an object across a line without changing its size or shape

So, the question is, how do we present the concept in an understandable way to our students who are blind or visually impaired and how do we give them a way to produce the work themselves?
Strategies for Teaching the Concept
-
Rotation:


When it is rotated the correct amount of degrees, place push pins into the other two corners of the triangle. They can then identify where the shape has moved on the coordinate plane.

-
Translation:
Using the different types of push pins, plot the original shape with one type of push pin, then when they are translating by counting left, right, up, down, they will place a different type of push pin in the new spot of where the shape is moving to.

-
Dilation:
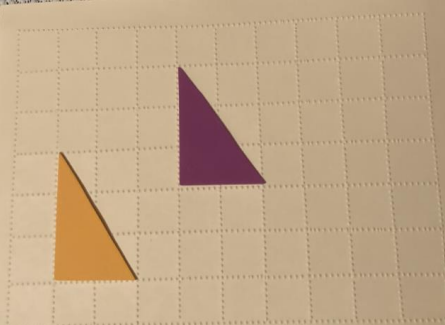
Use the same method as with translation using a different type of push pin to show how the original shape has grown.
-
Reflection:
Use the same method as with rotation. Have student literally flip the card stock shape from one side of the x or y axis to the other side, reflecting it over the axis.


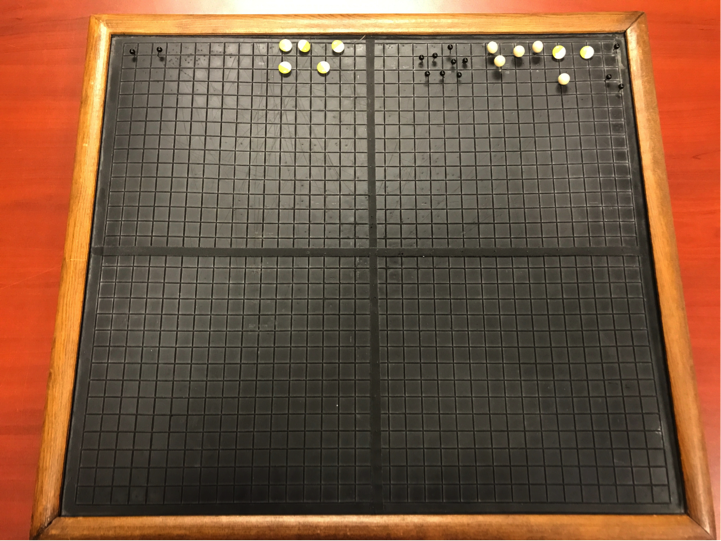
The push pins are great for allowing them to produce their own work as well. Once they’ve learned the concept of rotation and reflection, the push pin method can also be used.

The importance of the push pins is that they allow the student to keep the original shape that was plotted stationary, while manipulating and altering the new location of the shape with a different type of push pin. This is also a way for them to “label” their shapes.
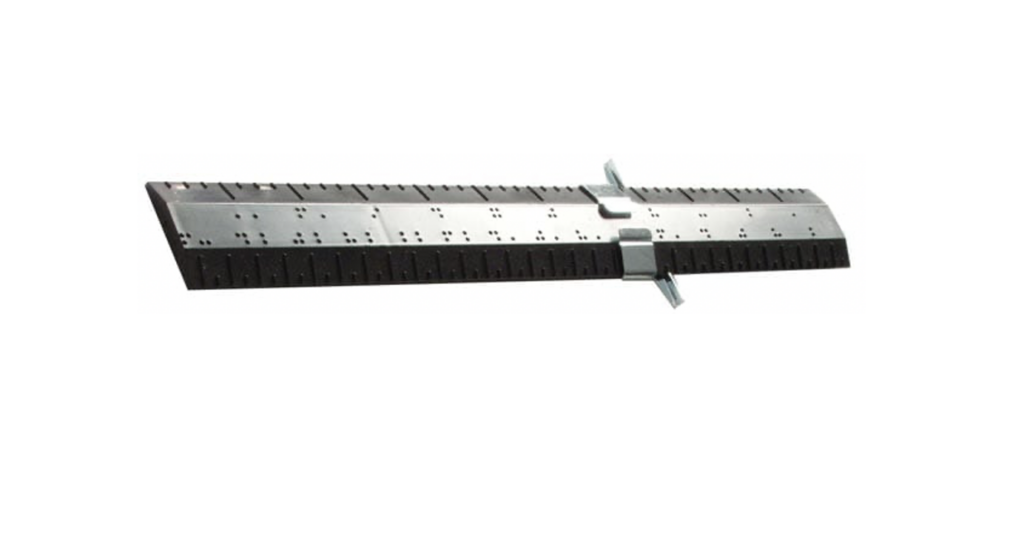
- Rubber Graphing Board (can be purchased through APH)
- Card stock
- 2-4 different shapes of push pins