The point of the game is to connect shapes to everyday things. By the end of the game, the child should know basic shapes and be able to connect them to 3D-shapes.
Purpose/Objective:
The child will be able to:
- Analyze shapes and compare two-dimensional (2D) shapes to three-dimensional (3D) shapes by naming how many sides each shape has.
- Connect 2D to 3D by naming the 2D shape in the 3D shape (the face).
Note that the difficulty of the shapes should relate to the child’s age and developmental level. Begin with circle, square, and triangle, and later more complex shapes, such as a hexagon or octagon can be added.
Procedure
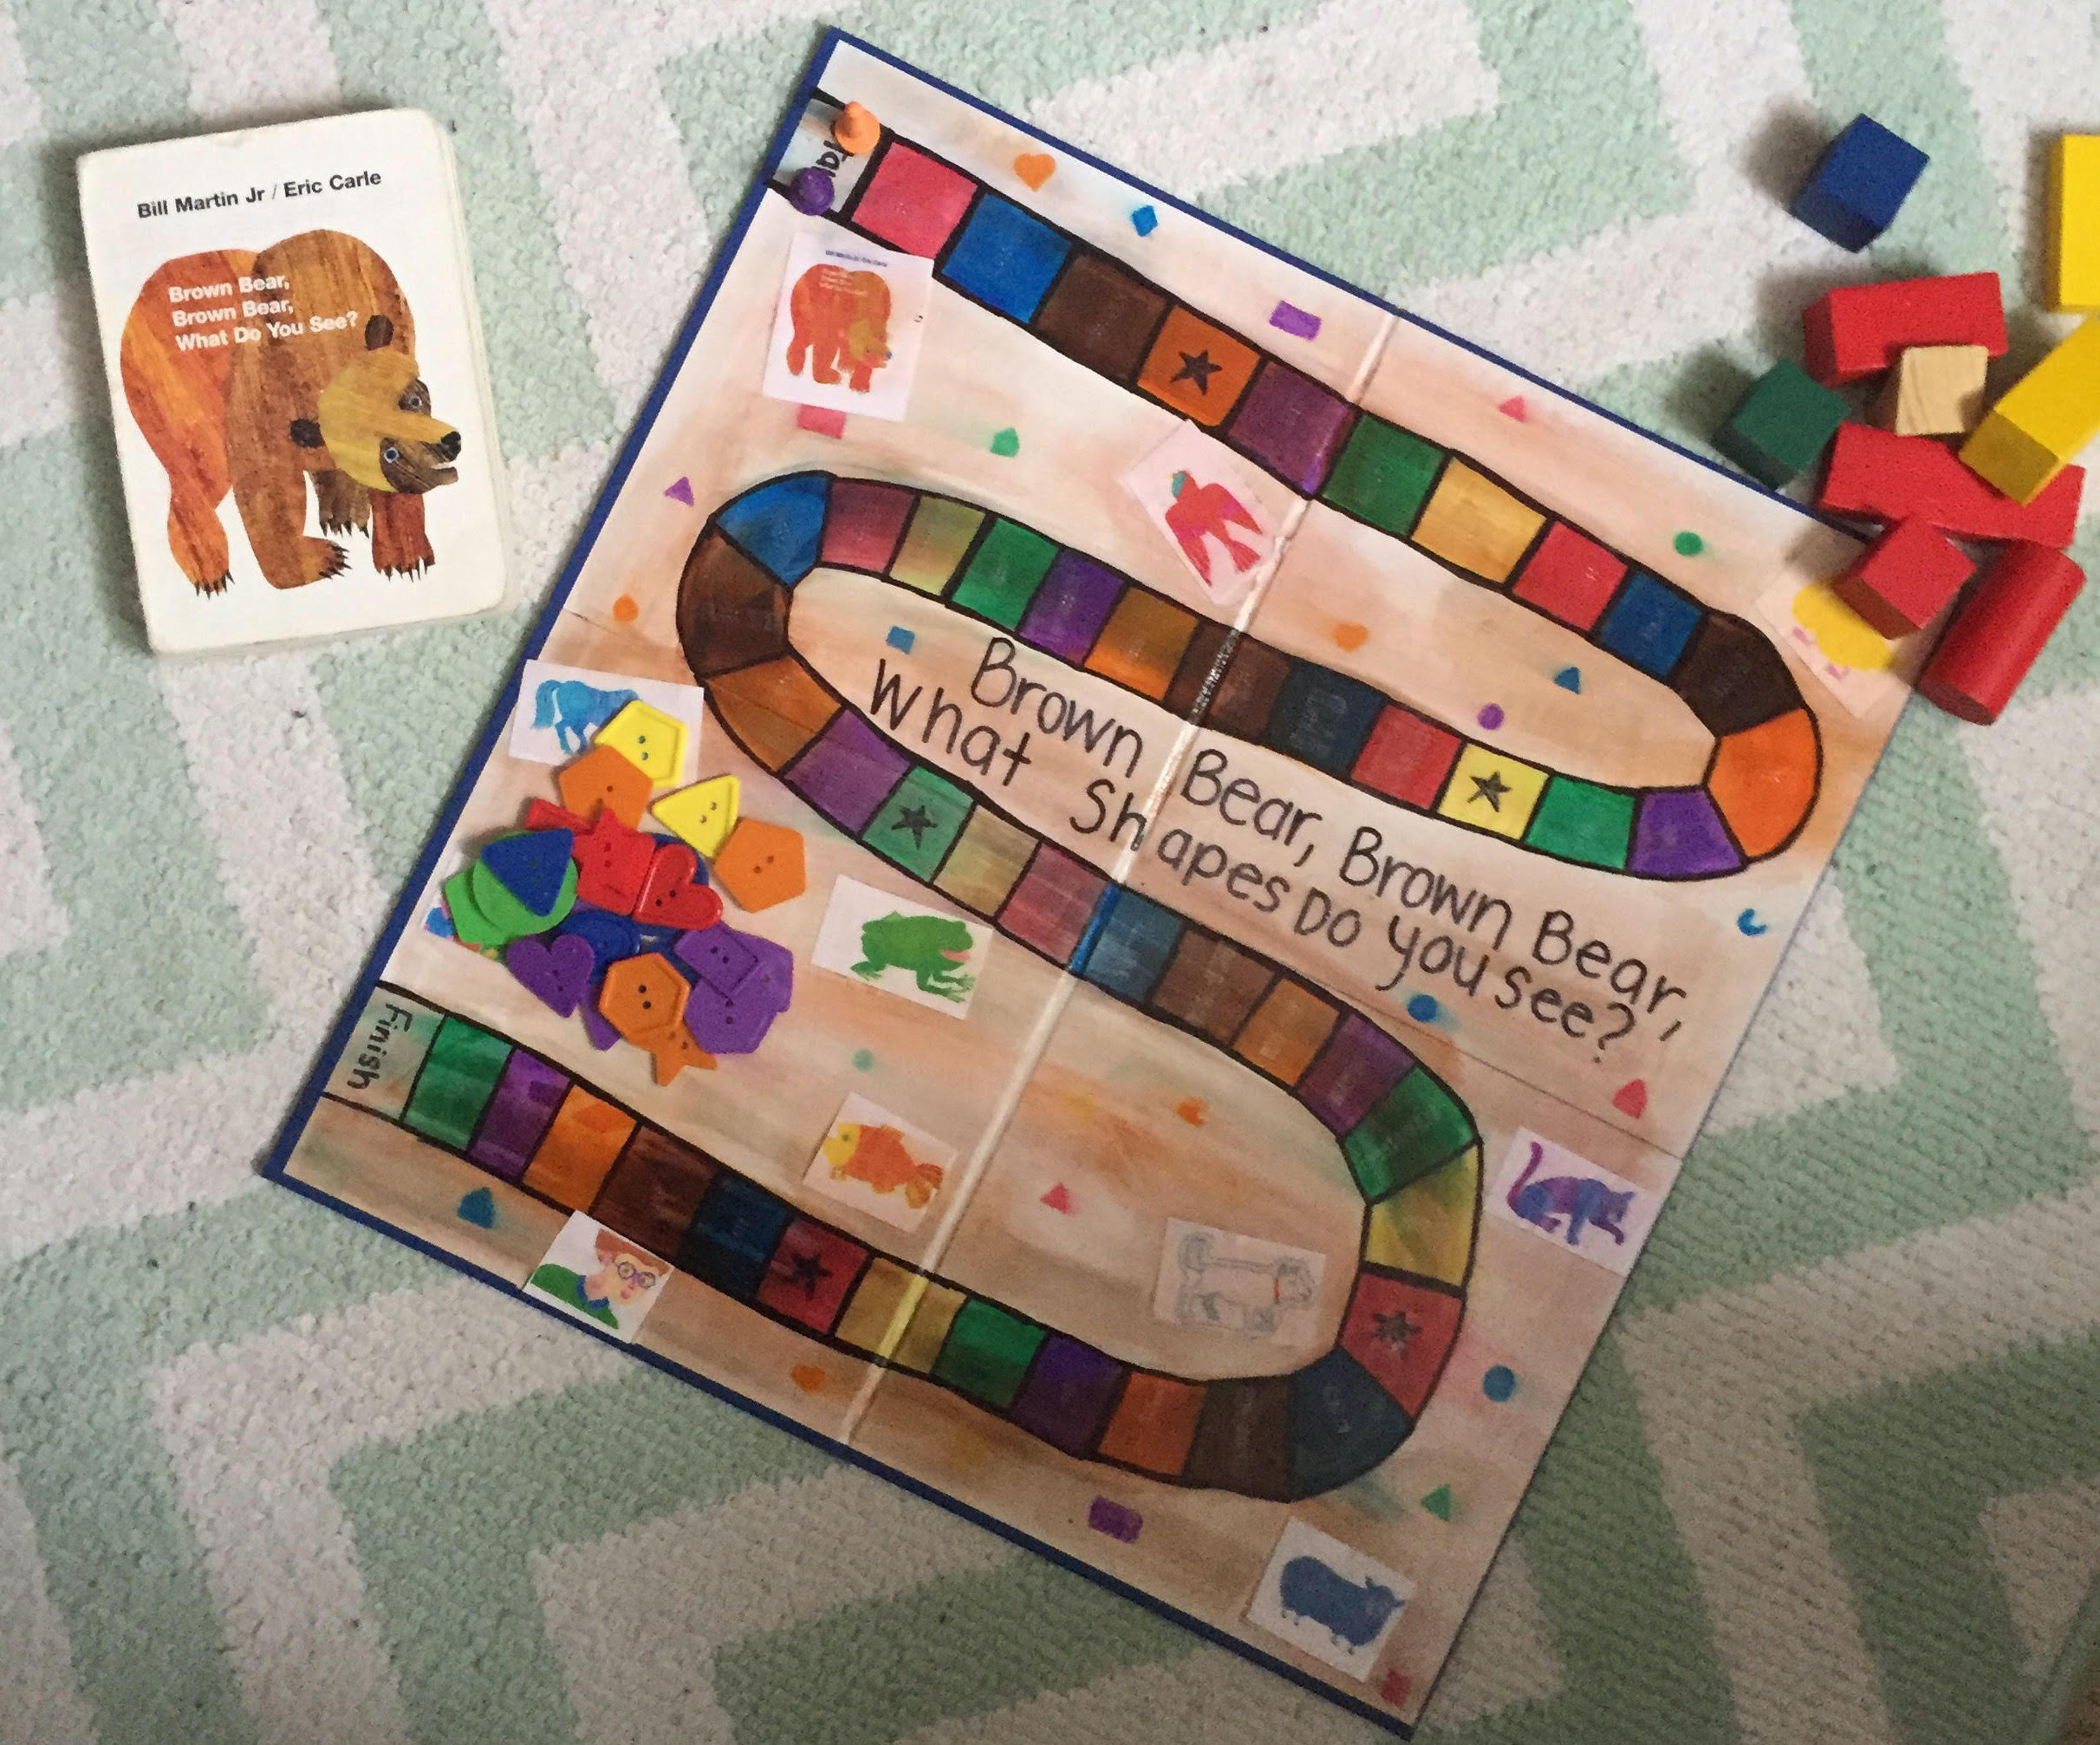
Begin by reading “Brown Bear, Brown Bear, What Do You See?”. This book is about what the narrator sees, and there are lots of opportunities to discuss with the child what they are able to feel and to identify the shapes of things. This helps to connect literacy to math. Children really enjoy books and to be able to make a game based off a classic children’s book will make the child more excited about math.
Directions
- The playing order goes from youngest to oldest.
- Each player gets a game piece.
- The player picks up a 2D-shape and counts how many sides the shape has, which indicates how many places on the board the player can go. For example, if the player picks up a triangle and counts the number of sides, he or she can then move 3 spaces.
- When landing on a STAR (a braille asterisk), the player picks a 3D-shape from the bag and names the shape and what 2D-shape is found on the “face” of the shape. If the player is right, they can move one more space. If they are wrong, they move back a space.
- The first person to reach the finish line is the winner!
Materials
- Game board
- Button shapes
- Game pieces
- 3D shape blocks


Other tips:
- You can purchase the game board kit from Amazon or simply make the game board from a poster board or cardboard. The kit is more durable and is inexpensive, costing a little under $25.
- I used markers and mod podge to make the game water proof.
- I made the game as colorful as possible for children with low vision. I would recommend using a lot of red or maybe neon.
- I got the game pieces from the kit I purchased. If you are not using the kit you can use anything small, like maybe like chess pieces or something with color for the students with low vision. It’s important to note each student is different and you might need to change the game to accommodate their needs.
- I used blocks and buttons, which I purchased both at Walmart, but both are also available Amazon. Instead of buttons you can also use tangrams. I think it’s important for children to use math manipulatives when using a math game. I think this is important for especially non-visual learners because they need more of a hands-on approach than using braille flash cards.
Adaptations for Braille Students
- I brailled “start” and “finish” for the students, so they know where to begin and to end.
- Each spot is also brailled using a full cell. If the student seems to be struggling with finding the spots I would add bump dots.
- I used the asterisk symbol on the spots with a star.
- The lines between each colored space could have a line of glue added to provide additional tactile guidance.