Published February 16, 2016
- Introduction to Standard Tactile Symbols
- The Developmental Model
- Standardization: Moving from Concrete Tangible Symbols to More Abstract Tactile Symbols
- The System is Sustained
- Continuum of Symbol Systems
- Concerns About the Use of Standardized Symbols
- Conclusions
- References
I have been asked to share my thoughts and experiences on some frequently-posed questions regarding standardization of tactile symbols. I am hoping that this post will launch some online conversation about the use of both standardized and non-standardized tactile symbols with individuals who have visual and multiple impairments. As you read this post, please consider and respond to these questions.
- Have you used tactile symbols with your students or children?
- What kind of symbols have you used (Individualized, Standardized, both)?
- What has your experience been in using tactile symbols (calendars, communication boards, speech generating devices, labeling systems)?
- Would a standardized system be appropriate for the students you work with now?
- Would it be feasible to produce standardized symbols in your setting?
- What has been your experience with the APH or other commercially-produced symbols systems?
- Do you envision the symbols being used as a long-term communication support for your students?
- What suggestions do you have for improving the standardized systems?
Introduction to Standard Tactile Symbols
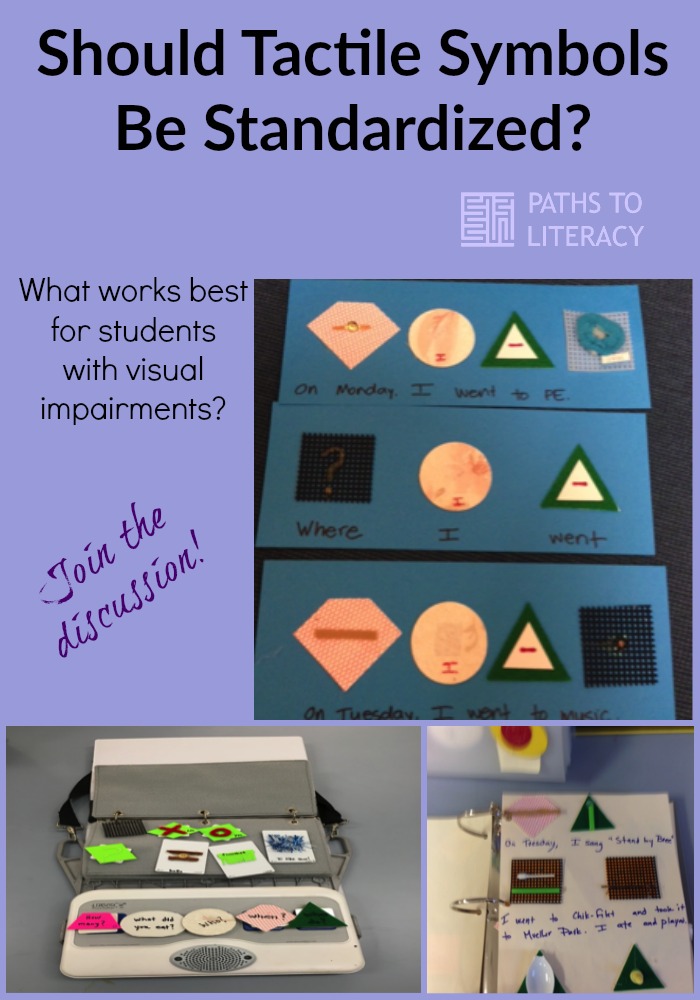
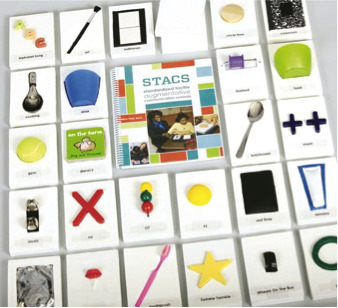
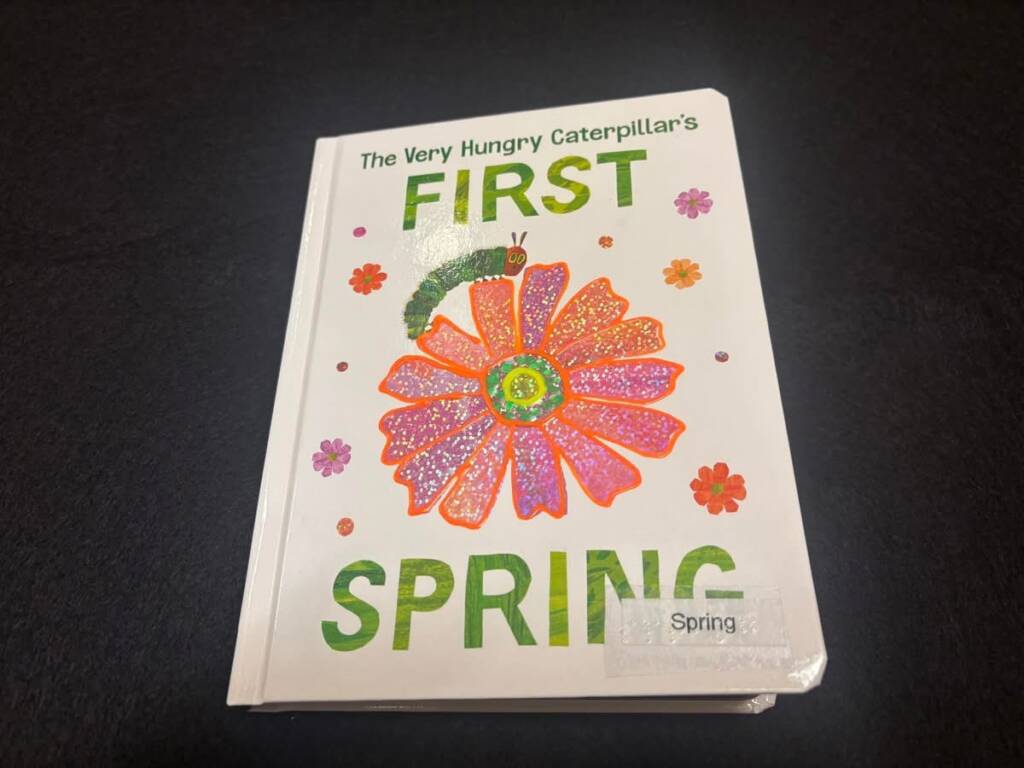
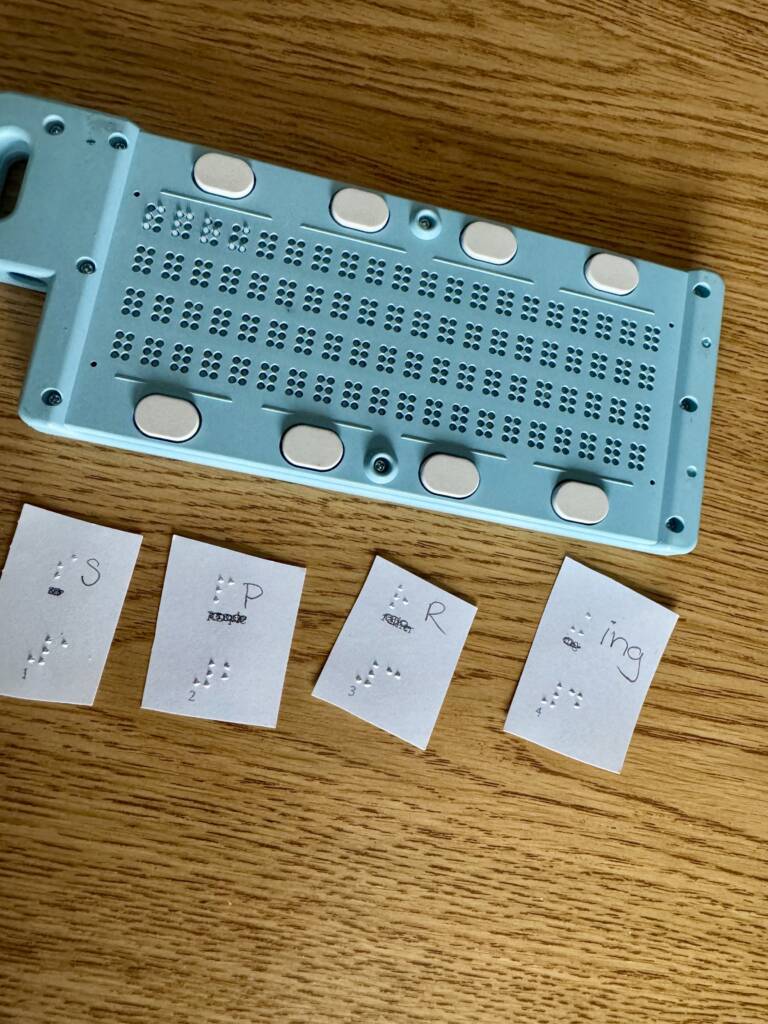
Tactile symbols are representations, often parts of objects, attached to backgrounds, which are used by people who are blind and do not read braille. For some, they are stepping stones to braille, for others the symbols are alternatives to braille. Representationally, they are similar to pictures for sighted people. I was involved in the standardization of a tactile symbol system used at Texas School for the Blind and Visually Impaired and previously wrote an article describing the system and its uses and limitations (Hagood, A Standard Tactile Symbol System: Graphic Language for Individuals who are Blind and Unable to Learn Braille). Since that time, I have witnessed the commercial production of commercially-manufactured standardized systems (APH, STACS system, Adaptive Designs Tangible Symbol Sets).
TSBVI Standard Tactile Symbols
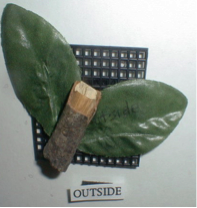
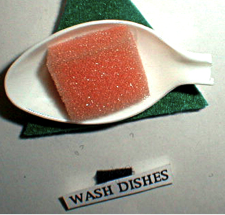
APH Tactile Symbols
Since the TSBVI system was developed in the 1990s, there has been considerable discussion about its use. Most proponents of tangible symbol usage for students with visual and multiple impairments suggest that symbols should be individualized, based on student interest and object use, and that the tangible symbols bear a concrete resemblance to the objects or actions which they represent (Blaha, 2001; Rowland and Schweigert, 2000; Smith, 2012).
Individualized Symbols (“Tangible Symbols”)
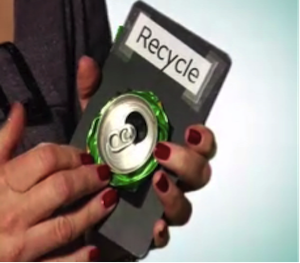
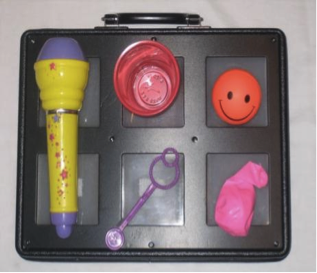
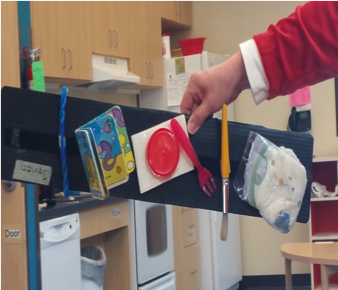
I support this perspective on individualizing symbols as a beginning step, and would like to respond to it by describing my personal journey toward accepting (and even embracing!) standardization of the system used at TSBVI.
The Developmental Model
In the early 1990s, I worked as a speech language pathologist in the program for students with deafblindness and visual and multiple impairments at Texas School for the Blind and Visually Impaired. This was a program that had a strong developmental philosophy—we believed in taking our students through a step-by-step process toward becoming symbolic language users before introducing print and braille. The process of developing symbolic thinking is described here:
- Build a meaningful activity with recognizable and consistent objects, e.g. making juice, in which the same pitcher or juicer was used every time.
- Begin to use the object within the activity to cue the student just before beginning the activity, and look for responses that suggest understanding (e.g. when presented with the pitcher, the student searches visually or tactually for the cup.
- Present the object from a few feet away, and see if the student still recognizes it out of context (travels to snack table, or searches for basket on counter that contains other objects used in juice routine.
- Present the object (pitcher) at the student’s object calendar area, looking to be sure that s/he demonstrates recognition (e.g. “pours” with pitcher, travels to area, or locates basket with associated objects)
- Present a set of objects (pitcher, cup, big spoon used for stirring, oranges and knife) and engage the child in a pantomime type “conversation” about the upcoming activity. Watch for signs that s/he recognizes the relationship between the objects presented (e.g. initiates “cutting” with the knife and orange, “pouring” with cup and juice”)
- Present a different object from the “discussion box” described in step 5 at the calendar (e.g. the orange or the cup) at the student’s calendar. See if he recognizes it as indicated by acting on it appropriately, selecting correct sets of associated objects, or traveling to area.
- Use a part of an object glued on a card as a more symbolic tactile representation for the activity (e.g. orange peel, part of a paper cup that is used only in the juice activity).
Another criteria for using symbols was communicative intent. This included the following:
- persisting and altering communicative behaviors. Example: The student extends foot for help with putting on shoe. If the adult doesn’t respond immediately, the student vocalizes, searches for the adult and extends foot again.
- performing communication behaviors in multiple contexts. Example: The student guides adult’s hands or offers objects to request at snack time, on the playground and at bath time. S/he does this with multiple partners.
- orienting toward the partner. Example: the child without vision may vocalize to initiate, and continue, changing orientation in response to adult voice; the child with usable vision orients body toward partner, or extends juice cup to partner (different from banging the cup on the table without orientation to adult).
Standardization: Moving from Concrete Tangible Symbols to More Abstract Tactile Symbols
- The parts of objects glued on cards didn’t always fit neatly into the experience books we were introducing as a way to talk about the past and the future. The books were so unwieldy that they barely resembled a book at all.
- The part-of-object symbols supported recognition of the activity as a whole, but not the individual object or action vocabulary I was hoping to model in the activities. We relied on the object sets in the discussion boxes to expand our calendar conversations about objects.
- The bulky symbols didn’t fit on communication devices which we were beginning to use with our students.
- Our population was changing—the parts of symbol representations were just a starting place for some of our students who had functional language, but lacked reading and writing skills. The new population of students we were serving were those with visual and multiple impairments, including cerebral/cortical visual impairment, optic nerve hypoplasia, and visual impairment and autism or other developmental disabilities. Teachers needed a “next step” for these students. It was a large developmental leap from these individual parts of object symbols to the introduction of print or braille, and we had no “in between” step.
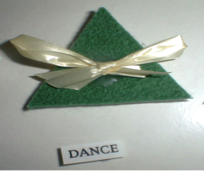
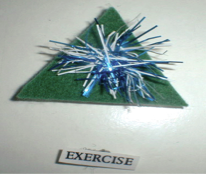
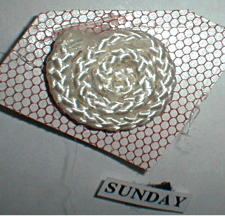
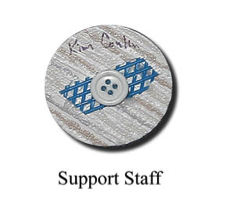
Objects on ovals,

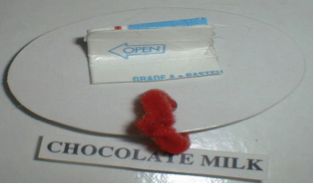


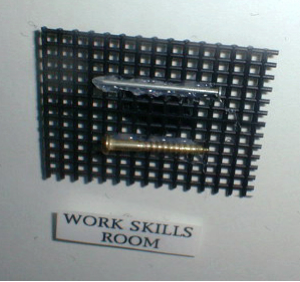
Places on needlepoint squares,
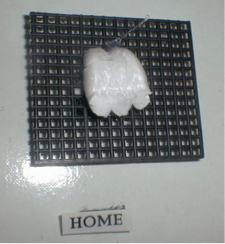
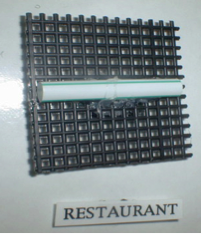
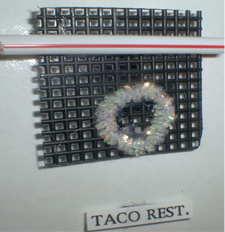
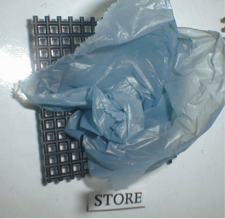
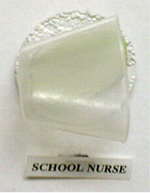


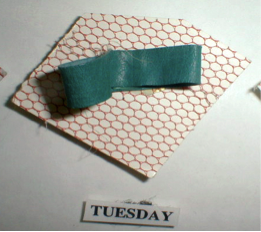
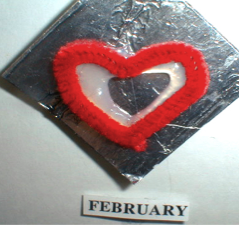
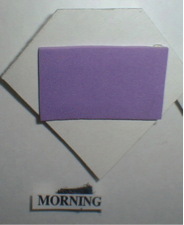
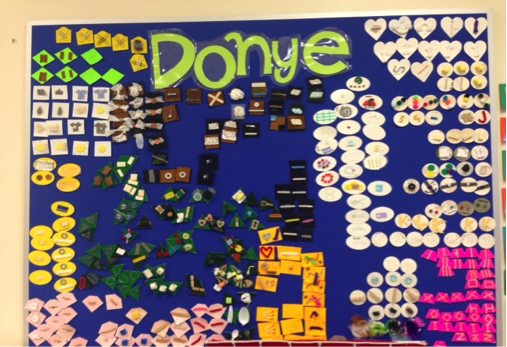
We selected vocabulary based on the most common activities we had engaged in with students in the program, and on words which we wanted students to use and understand. In selecting items (“doo dads”) to glue on the cards for specific words, our criteria were—to use a part of a real object and make the symbols concrete in that way whenever possible (e.g. a bread tie for the word “bread”), and to use materials which could be easily and inexpensively located and replicated. Sometimes, the “doo dads” were more abstract, such as the crossed paperclips on a green felt triangle to represent “work”, with a more concrete item paired with it to represent the type of work (e.g. a piece of towel for towel folding job, a coffee bean to represent work in the coffee shop). A symbol for “music” might be modified by adding a symbol representing a specific song or instrument. Teachers and other staff were asked to create their own individualized name symbols and to wear them when getting to know students. The items we chose to glue on the backgrounds were either recyclable objects like milk bottle tops or tabs from soda cans, or they were easy to purchase in discount stores throughout the state. A directory to the symbols currently used at TSBVI is available at http://www.tsbvi.edu/tactile-symbols. Excellent video discussions of the symbol system by David Wiley and Carol Bittinger are available on the TSBVI website at http://library.tsbvi.edu/Browse/Category/15.
A special room was set up for symbol construction, and the “doo dads” were organized alphabetically in small drawers and baggies. The background shapes were created in a large scale operation, and Velcro was attached to the back of each one. Symbol “directories” with examples of the symbols by category were posted on the walls, and a list of standardized symbols was created. If a teacher needed a specific symbol, s/he could go to the symbol room, reference the list, and use the glue gun to glue the doo dad on the corresponding background shape. If a new symbol was added to the set, the teacher could create a sample and add it to the list on the wall and the written directory. The symbol directory was reviewed by committee on regular bases to determine whether there was tactile confusion between newly added symbols.
The system is sustained…
- on calendars,
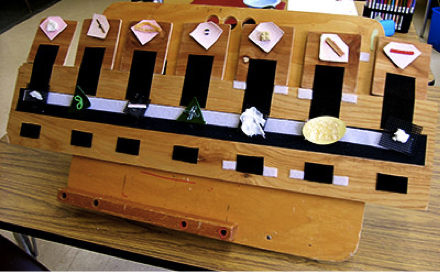
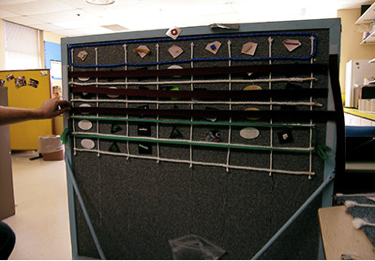
- to label locations and items in the environment,

- as illustrations in experience stories,
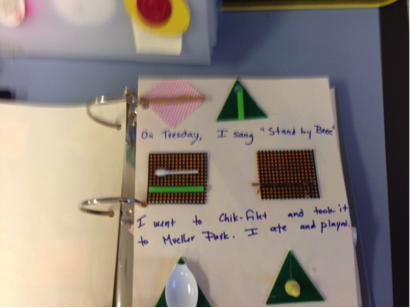
- on sentence strips to expand children’s single word utterances,
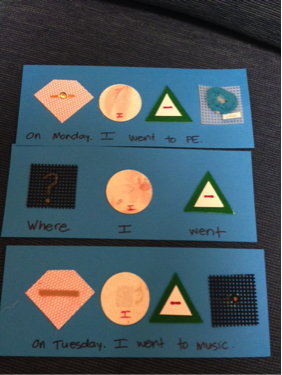
- as a way to help break up echolalic language patterns by moving “words” around or replacing them in a memorized phrase (e.g. “ashes ashes we all jump up/ spin around/ fall down” “ Wednesday we go swimming with Todd” can also be said in a different way: “Todd swims with us on Wednesday”)
- to introduce braille, with a set of symbols from different meaning categories in the “c” box or the “c” book (cafeteria, cooking, car, can opener, cat, crazy)
- to provide a concrete system for asking and answering questions

Conceptually and developmentally this system lies somewhere between the totally individualized concept of Tangible Symbols suggested by Rowland and Schweigert (2000) and the mass-produced systems marketed by APH and Adaptive Designs. The chart below shows the developmental progression of symbol use for students who are visual and tactual learners.
Continuum of Symbol Systems
Individualized System -> Standardized System
| BRAILLE (tactual learners) | PRINT (visual learners) |
|---|---|
| Objects | Objects |
| Alternate objects | Alternate objects |
| Parts of objects / Individualized symbols | • Parts of objects / • Individualized symbols • Clear concrete photos (of calendar objects, people) |
| Standard tactile symbols | • Line drawn pictures • Tracings of objects • Photos (more complex, representing actions, alternate objects, highlighted activities) |
| APH Symbols / other commercially produced symbols | Boardmaker pictures / other commercially produced picture systems |
| Braille |
Concerns About the Use of Standardized Symbols
Now that I have worked in “the real world” of public schools for at least as many years as I spent at TSBVI, I have a new set of concerns about the ways these and other standardized tactile symbols are being used.
- They should only be used with students who demonstrate symbolic capabilities and intentional communication. If they are used with students who are presymbolic and preintentional, the students may quickly reach a plateau of comprehension, using any symbol to request snack, or learning only symbols which are presented frequently in the context of a predictable daily schedule. If this is the case, a more individualized or object-based symbol system is recommended.
- Teachers in school districts may not have the time or motivation to create and expand systems for just one or two students in a district. The background shapes and textures take a lot of time to create, initially, although some ambitious TVIs have managed to replicate the system.
- The symbols are often used only as cues or directions for student actions, not to support conversation or communication. If this is the function for the symbols, it is not necessary to embrace the whole system.
- Teachers need to recognize that tactile symbols are only one of many forms for supporting communication—objects and touch cues are always available, and all of us use a variety of forms.
- Some students might be better candidates for Braille or print instruction, and do not need teachers to invest in this labor intensive system for communication.
Conclusions
The most interesting benefit of this system, as I have seen it, is to help adults realize the value of expanding topics (activities) and vocabulary (objects, people, actions, feelings, places) used as contexts for teaching. In my consultation with teachers of students with multiple disabilities, the first issue that arises is often “What does he have to talk about?” Tactile symbols, presented in books, on wall displays and calendars, do provide teachers with a tangible reminder to increase the variety of motivating and interesting topics and vocabulary available for communication presented by responsive partners.
Though communicative form is just one component of communication, it is the most obvious one. The commitment of the staff at TSBVI to sustaining and growing this system is remarkable. The evolving system shows the rare and valuable benefits of having a united approach to supporting alternative forms of communication and literacy.
References
Blaha, R. (2001). Calendars for students with multiple impairments including deafblindness. Austin: TSBVI.
Hagood, L. (1997) A standard tactile symbol system: Graphic language for individuals who are blind and unable to learn Braille. Austin: SeeHear.
Rowland, C. and Schweigert, P. (2000) Tangible Symbol Systems: Making the right to communicate a reality for individuals with severe disabilities. Retrieved from: https://osepideasthatwork.org/sites/default/files/TangibleSymbol%20Systems.pdf
Smith, M. (2012) Symbols and Meaning, Volumes 1 and 2. APH: Louisville, KY.
