We have successfully transitioned my son who is non-verbal and scored at a 2.5 on The CVI Range (Dr. Christine Roman-Lantzy) at his initial assessment to a current score of 5++ by using whole objects in an object schedule system to using photographs of real objects to represent objects and activities. This entire process took 4 years.
Starting Out with Familiar Objects
We began using real objects that were familiar and highly motivating in black Expandable Calendar Boxes from APH to show my son what we were going to do next. We started with just one object at a time and would tell him to “check his schedule” After he was successful with one item at a time, we added a second and then a third item, each in their own box.
 in expandable calendar box")
We began with his target color of red inside the box to gain his visual attention. For more on target colors, see Dr. Christine Roman-Lantzy’s book Cortical Visual Impairment: An Approach to Assessment and Intervention.
Moving to Tactile Cards with Objects or Partial Objects Attached
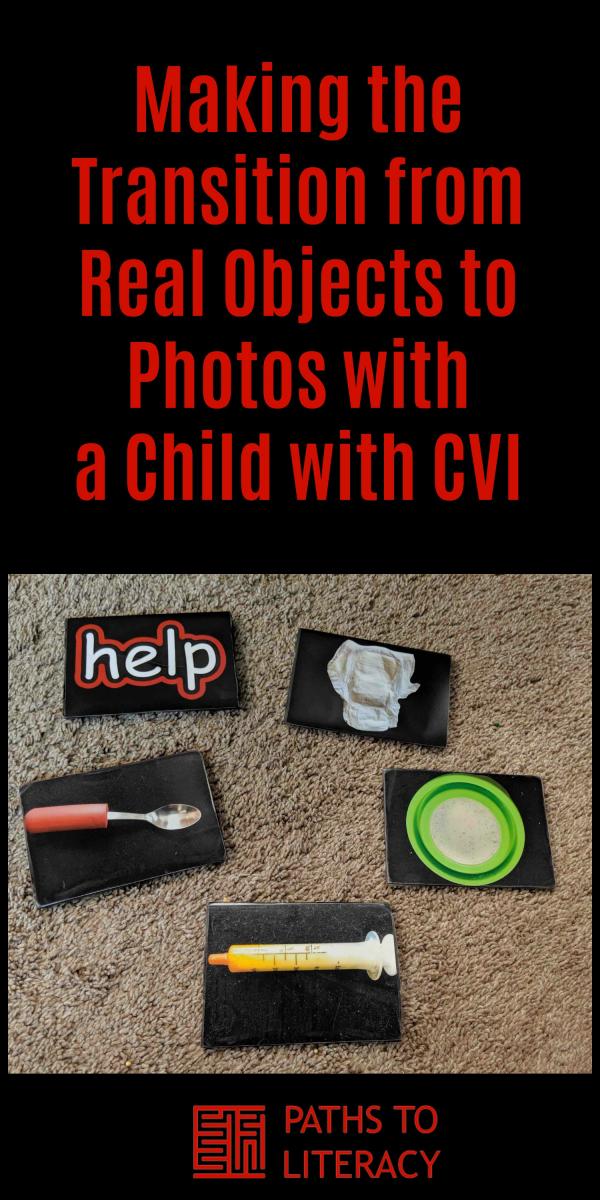
When the concepts of whole objects were mastered, we transitioned to using pieces of the objects and attached them to the black tactile cards. We used the black Tactile Connections cards from APH.
Some of the items we began with are:
- Lid of his food bowl that he uses for every meal to represent: bowl or food
- Spoon to represent spoon. We kept the whole shape of the spoon, so we could discuss the salient features of a spoon.
- A piece of his diaper to represent time to use the bathroom
- Whole timer to represent requesting more time
- Syringe to represent time for medication
- We created the word help using tactile paper and red bubble outlining in puffy paint. My child’s target color is red.

We would show each of these items on his schedule board that we created from a slanted peg board that we added black matting to. We ran strips of velcro across and used red tape to section off the positions that the tactile cards are to be placed. Again, we used red as a target color. We utilized a red basket at the bottom for the “done or finished” cards to be placed. We also attached a spotlight that can easily be adjusted to the part of the board you want to focus visual attention. We used the IKEA -Jansko spotlight. We began with one tactile card at a time, working up to a field of 3. A large All-In-One Board also works well for this.
Moving to Photographs
After mastery of these cards and showing growth on the CVI Range (Dr. Roman-Lantzy), we moved to photographs of the same objects printed on 3×5 size. We backed the photos on black foam and covered with a clear laminate. We zoomed in on the photo and used just the image of the object on black background, making sure to not include any background colors or pictures to reduce the complexity. (Dr. Roman-Lantzy)
We started with one photo at a time and initially paired the photo with the real object and then eventually progressed to showing an array of 4.

After mastery of the larger photo size, we printed pictures at a 2×3 size and fit them directly on the same black Tactile Connections cards. We worked our way up to a field of 6 with these. However, we have kept the larger image size of 3×5 when showing a more complex picture, such as a location in the house.

Creating a Salient Features Dictionary
It can be helpful to create a dictionary of salient features, so that all members of the team are stressing the same salient features of an item. Here is the dictionary we created.

Lessons Learned
There have been many phases of his schedule system and cards used that we can call trial and error. We initially began with using different colored Tactile Connections cards thinking we could categorize words, such as placing all the hygiene-related items on blue cards and activity-related items on green cards, with the idea that that would help him associate the item with location. However, my son was not making gains quickly with this set-up. He wasn’t showing sustained visual attention and did not know what the cards meant. After receiving an outside consultation with a CVI-endorsed TVI, we taped over all the colored background on the cards with black duct tape before purchasing black only cards and noticed instantly that his sustained vision improved and his comprehension of the cards improved. Our consultant believed that the colored backgrounds were visually distracting and that he could have been more drawn to the blue card than the item we had glued on the card that we were wanting him to look at.
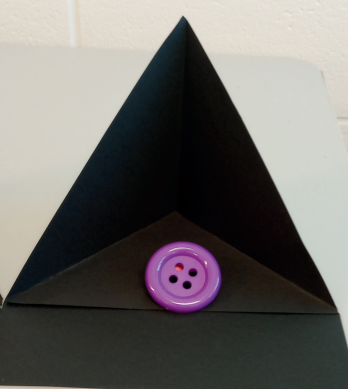
We also learned that the abstract items used on cards were not as easily understood as real objects or words. It was hard for the school team to come up with items to represent transitions to other classrooms or therapists. For example, the school team arbitrarily assigned a red teddy bear to represent the speech teacher coming. This red teddy bear had nothing to do with his time in speech therapy and he did not learn the card or meaning. We also used a random green shape to represent “yes” and a red X to represent “no”. Again, changes were made after our outside consultation with a CVI-endorsed TVI who told us to explain the salient features of the visual item we are trying to teach. If we can’t explain how a green blob equals “yes” or a red X equals “no” then we should just use the actual words “yes” and “no”. Actual words are unchanging and will also be spelled the same way and look relatively the same in print. It was a big aha moment. And instead of a red teddy bear to represent speech therapy, use the word “speech”. Our team was afraid to use words because my son didn’t read or speak. However, we learned that we can teach him the visual characteristics of the word shape, just as we would do to any unknown image or object he looks at.
It’s important to note that every time we add a new card to his board we spend time pairing the card with an actual object if possible and pointing out the salient features. We have created a salient features dictionary in Excel that is constantly being updated and shared with his team. We also have one physically hanging near his schedule board so that his team is all using the same visual descriptors when asking him to look at his cards.