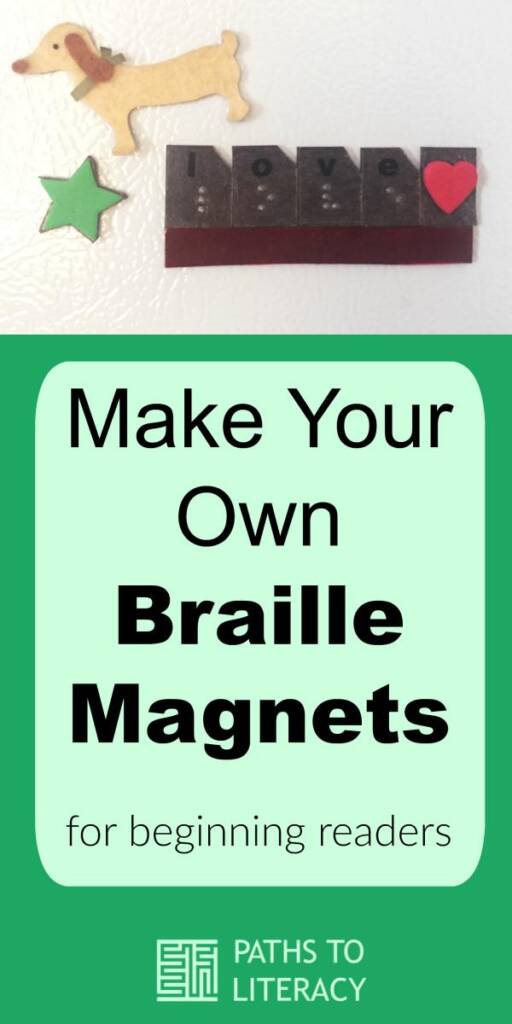
I wanted braille magnets to adorn the lower half of a preschooler’s fridge at home and grandma’s house. I had specific criteria: consistent braille spacing, words easy to track across when tiles lined up, and the magnets needed to be strong enough to stick when reading.
Then as I started talking about curriculum with the next year’s kindergarten teacher, I realized braille alphabet magnets were not just a way to provide incidental exposure to braille, they would be a tool in the classroom as the teacher taught letter recognition and phonics.
The kindergarten class will be using Fundations® to practice letters and phonemic awareness. Because Wilson Language makes Fundations and The Wilson Reading System, and APH carries a braille version of the Wilson Reading System, I was excited that I could get braille versions of the magnetic tiles they will use in the kindergarten class. I wanted my student to have time over the summer to play with braille alphabet tiles, so he would be ready to learn with them in kindergarten. Given the importance of mechanics when reading braille, I also wanted to add an adaptation so braille letters could be lined up easily by the student or an adult. Of course with print letters, the exact placement next to each other does not impact legibility the way that it does in braille. Focus on tracking skills must be integrated when using this tool.

Materials
- APH Feel ‘n Peel Alphabet Stickers
- Magnetic squares, 20mm x 20mm, self-adhesive (Good quality, not flimsy; the ones I am using are made by Magnefic! and were $8.00 for sheet of 70 from Amazon)
- Stokes Braille Place Holder from APH or similar magnetic board or cookie sheet
- Good quaility scissors

Procedure
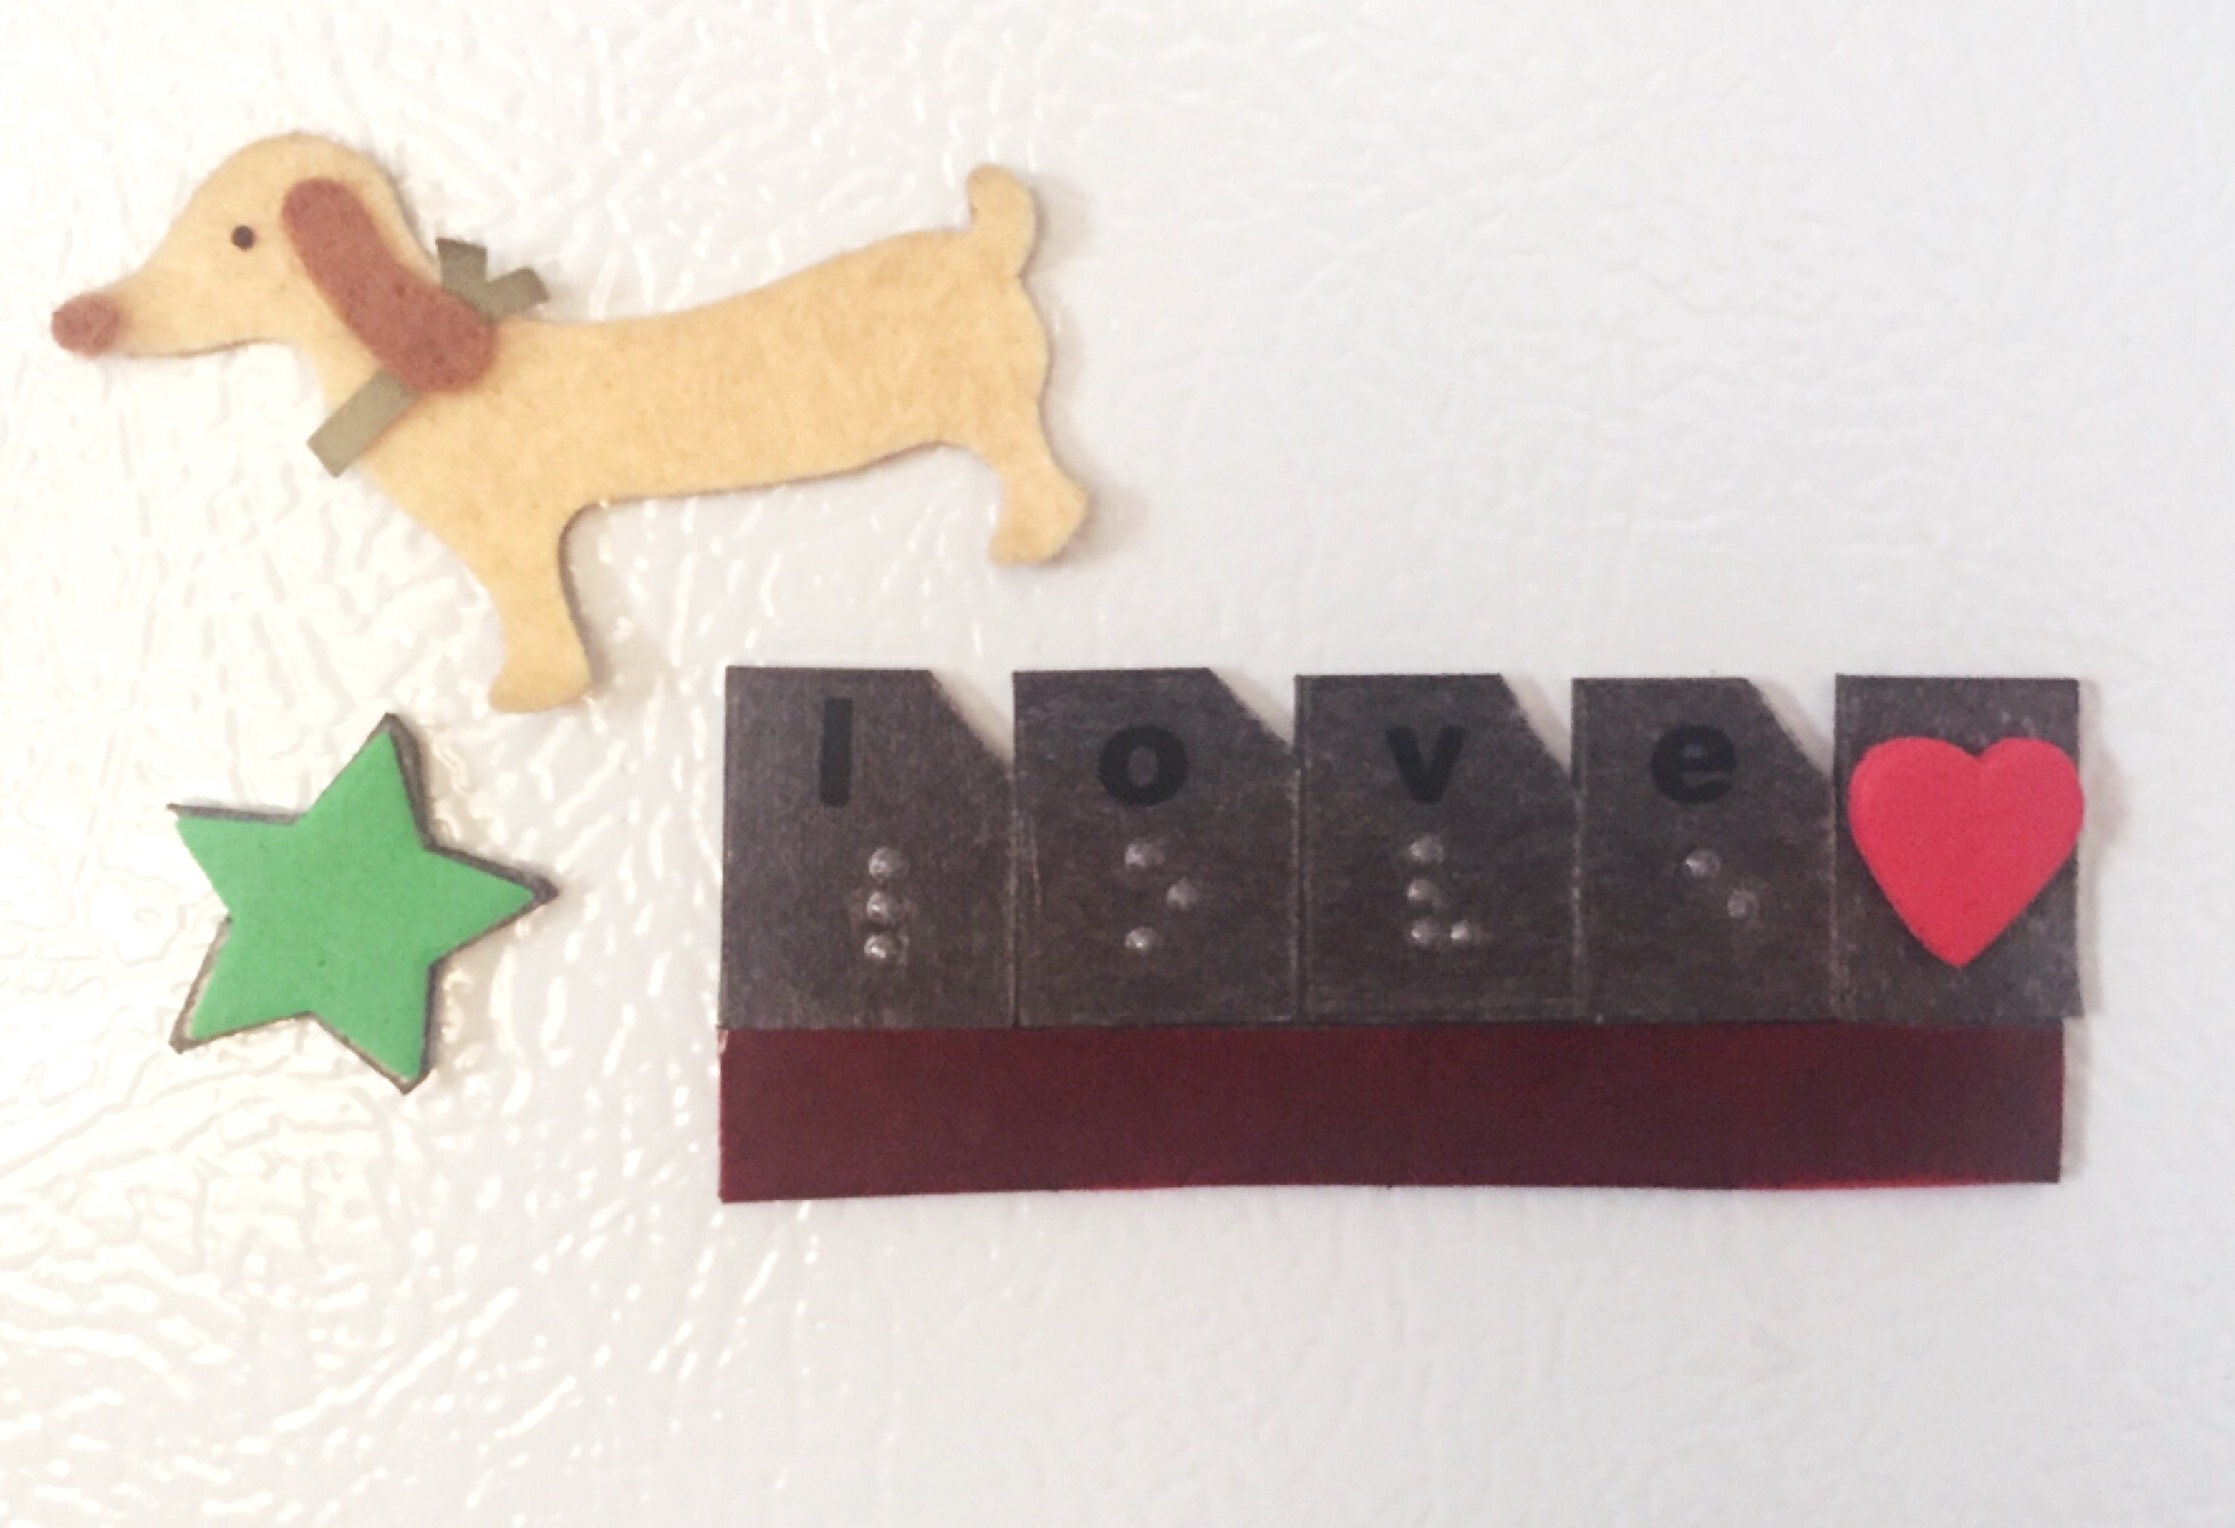
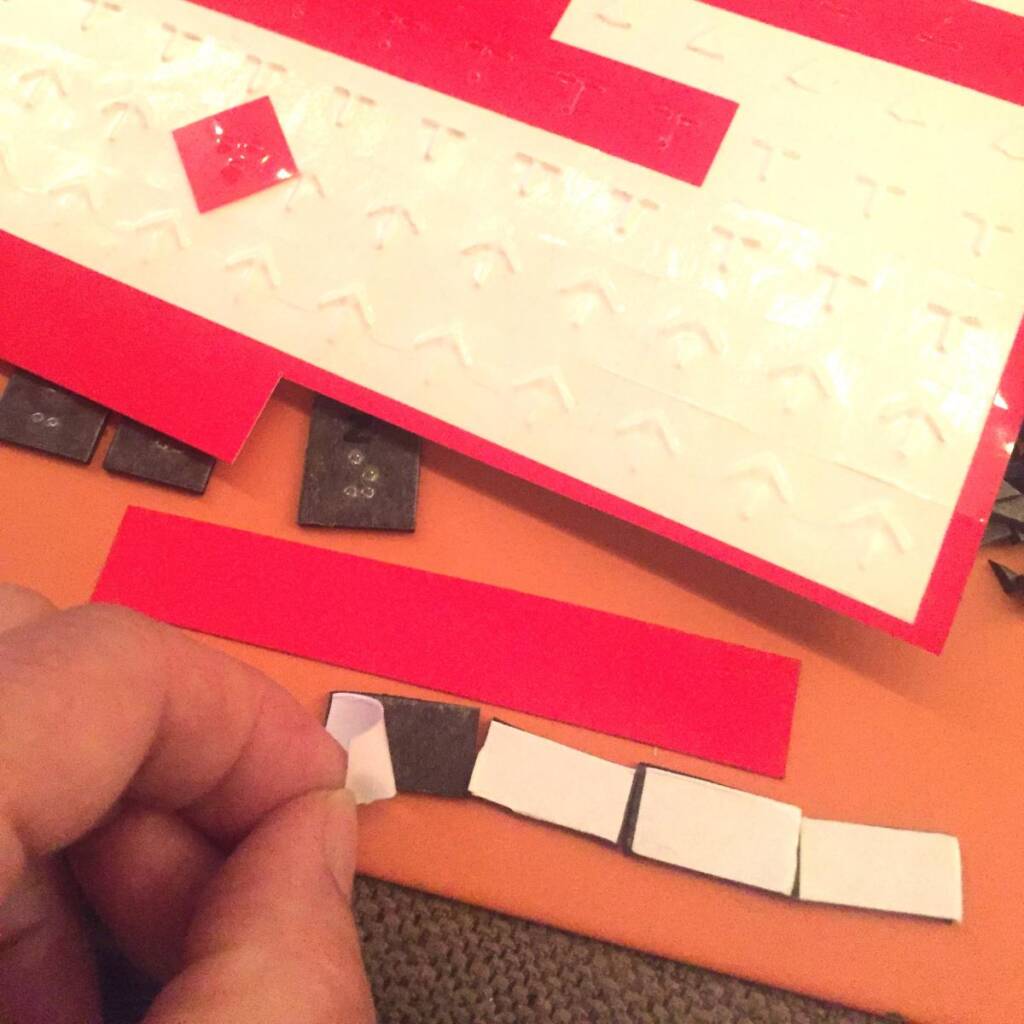
- Peel paper off magnet tile to reveal adhesive, peel letter sticker off page, place letter sticker on left side of magnet (adhesive to adhesive). Sticker is smaller than magnet square.
- Repeat 25 times!

- Trim about 3/16 inch off magnet where sticker did not cover magnet and clip the top right corner off. Magnet tiles cut easily, but good scissors and steady pressure result in a straighter cut.

- The last step is to make some long magnets to serve as a “table top” for letters to stand on. I cut magnets squares in half, lined them up long-ways to make long horizontal rectangle and then used rectangle I cut from the edge of APH sticker sheet to attach them all.
Finished set!

Variations
Print letters are visible, but are low contrast and would not work for student with low vision. One way to make print letter more visible is to add correction tape to sticky side of letter sticker.

Make whole words, make some shapes or textures, have fun!