 Handwriting Without Tears (now called “Learning Without Tears”) is a multi-sensory writing curriculum created for early childhood through 5th grade. I have been using the pre-school program called, Get Set For School, in my early childhood classroom for children with visual impairments.

I learned about the curriculum through the Occupational Therapist who serves my classroom, and fell in love. I went to a training, which they provide nationwide, and have seen a huge improvement in writing skills, as well as increased interest for writing activities for my kids with low vision. I have really enjoyed that the teaching strategies and the materials provide a multi-sensory and hands-on learning experience for the low vision kids.
How I’m Using the Curriculum:
I have been using the HWT curriculum primarily with my low vision kids, but my braille kids have enjoyed some of the songs, and the letter pieces. Although I haven’t used it much with my braille kids, I would definitely include them in small group lessons for practice with positional concepts and an understanding of print letters in a hands-on way.
The curriculum is created for the purpose of writing, and focuses on the uppercase letters only. Visually, a child should still be learning to recognize the lowercase letters, but the HWT curriculum focuses on writing the uppercase letters first.
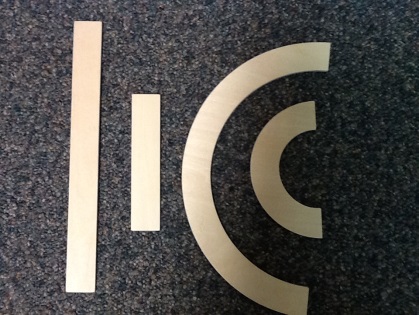
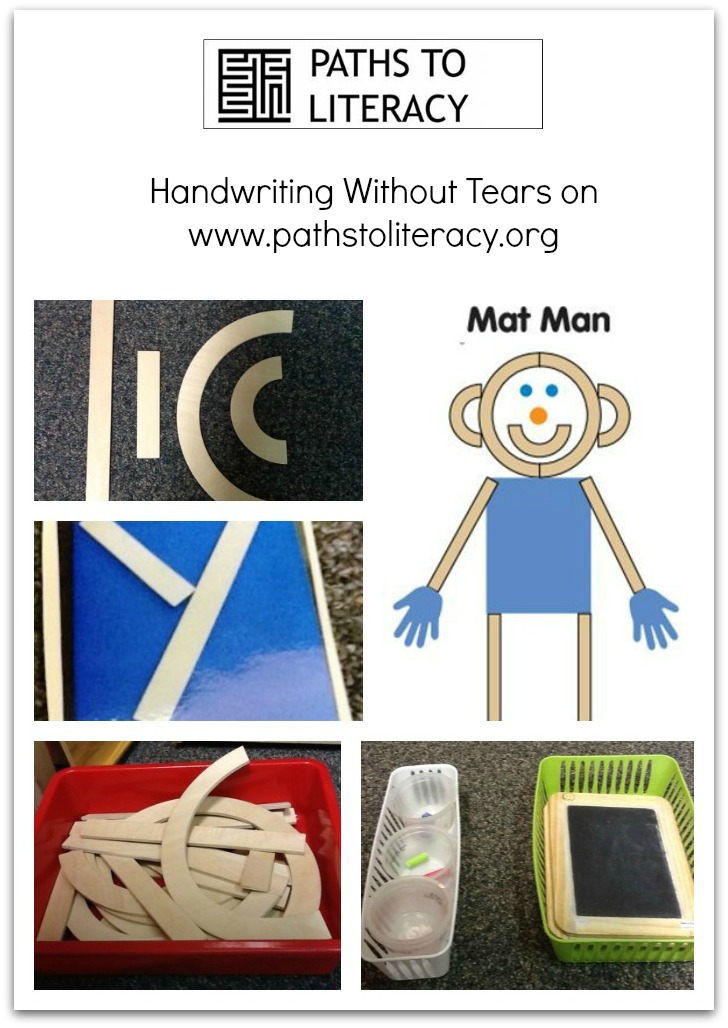
The first pieces of equipment you use are the letter pieces; they consist of big lines, little lines, big curves, and little curves. All these pieces can be used to create all the uppercase letters of the alphabet.
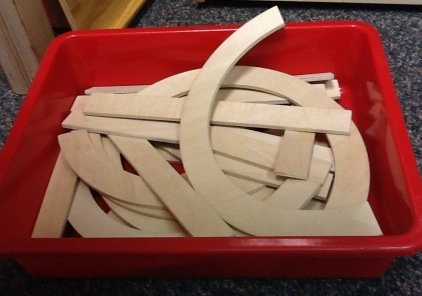
I keep my letter pieces all mixed together in a box on a shelf, but they could also be sorted out so that you can easily find the shape that you need. The materials come with a lesson plan book, which shows the order to present the letters, and helps you learn the wording for creating the letters. For example, the letter L, you would put a big line down on the left, and then a little line across at the bottom.
After working with my students for a long time with the letter pieces, I took pictures of all the letters created with the pieces and I have them out so that if my kids want to work independently they have a visual model.
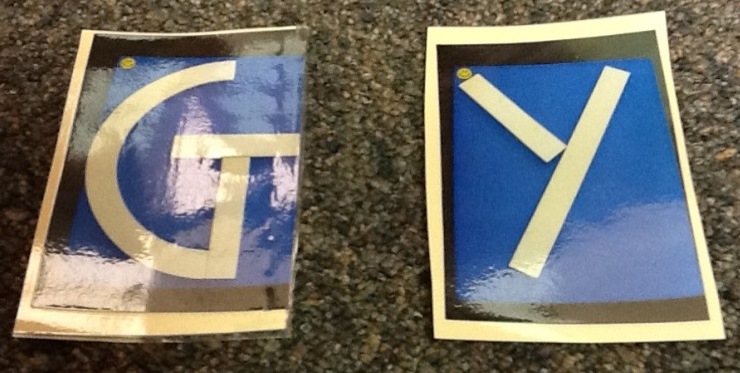
(I laminated mine, so they do have a little glare… so far they have worked out, but I know that eventually I will need a new set without glare).
You can see in the image of the letters formed, all the letters are created on a mat; it has a little smiley face in the top left hand corner to mark a starting spot. This is something that is a focus on all the materials so that kids are learning the proper place to start their letters and have that visual reminder.

The mat is also a focus for the Mat Man, in which you use the letter pieces to create a man. It is a fun small group activity and helps the children get the idea of drawing, and creating all the parts of the person through the manipulative pieces.
Adaptation to the letter pieces:
I have some kids with low vision who are interested in writing and letters, and doing everything that their friends are doing, but have poor motor planning and coordination making manipulating the pieces very challenging and frustrating. I have a set that I cut out of foam and I put Velcro on the back and use it on a felt board or invisboard from APH. This allows them to create the letters with their friends, but not accidentally move their pieces around when added more or moving to pick up pieces.
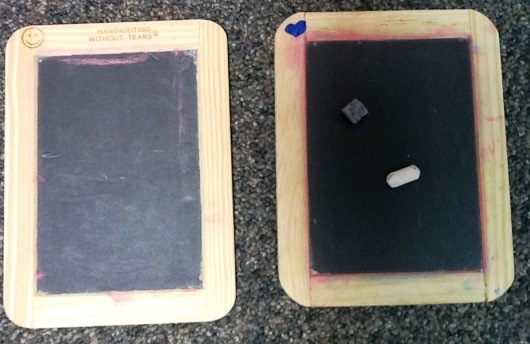
Wet Dry Try
After using the letter pieces for a while, you will introduce the chalkboards in the process HWT calls, Wet Dry Try. My kids love this!! The materials come with little chalkboards, (pre-marked with a starting spot) little pieces of chalk, and little sponges. Everything is little to promote the proper pencil grip (it really works). The CD that comes with the materials also has a little catchy song about how to hold the pencil/crayon properly.
Now the process:
- You can start by making the letter to be written with the letter pieces first, and then use the chalkboards
- The teacher writes the letter, using the proper language for that specific letters (Big line down on the left, little line across at the bottom) as the student watches.
- Now, the student “Wets” it. They take the little sponge, dips it into a little cup/bowl of water, squeezes it out, then traces over your writing in the same pattern to erase it (practice 1)
- Now, the student takes a little pieces of paper towel, crumples it into a small piece and “Dries” the board, again by making your exact lines (practice 2)
- Now the student “Tries” it on their own with the chalk (practice 3)
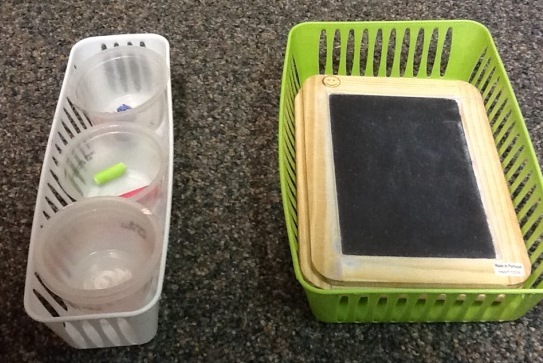
I also put the chalk, small cups and small sponges out so that they could practice on their own.
When writing the letters it takes up the entire chalkboard, and they use the sides as a guide to create straight lines and to have a clear starting and stopping spot. It is amazing for my low vision kids to have that tactual cue, the chalk provides pretty good contrast, and they have already practiced making the strokes 2 times before they ever try to actually write it! Talk about muscle memory!
Get Set For School Workbook:
The final way that I really use the curriculum is through the workbook that they provide in the Get Set for School Curriculum. It is called My First School Book, and has different types of coloring an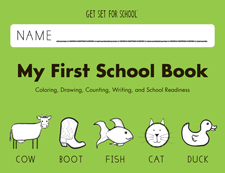 d writing practice sheets, presented in the order of the curriculum. I have my students use the little crayons to work on the pages, and they really seem to enjoy the worksheets. The pages have pretty clear and simple pictures for the low vision kids. I also like that they use what they call a gray crayon mark, it is a solid gray line for the kids to trace, rather than the dotted lines that you see so often. I find the dotted lines to be cluttered and visually confusing, these gray crayon marks are very easy for the kids to follow… however, they do not copy well, so I tend to make a copy (I didn’t buy a workbook for each student, and often times they need to practice a page more than once anyways) I then highlight the copy on the lines that they are to trace, it has worked out well.
Additional Information:
HWT has many different materials and products that they offer, but this is all that I have tried so far. They also do training for math and numbers, but I have not gone yet. You can buy all of their materials from the website, in sets or individually. If you go to one of the trainings you get all the materials that I’ve talked about, and more, at the training.
On the website, https://shopping.lwtears.com/category/workshops, you can see if there is any upcoming training in your area, and see all the materials that they offer.