I have been encouraged to share some tips on creating Braille Art with a Perkins Brailler. These “Art” pieces help students by encouraging them to participate in holiday traditions throughout the year like other sighted students, while they practice their braille skills. (Listening skills are also improved if done as an oral exercise).
The first step in creating a Braille Art piece is to find a suitable icon to duplicate. This can be done through a Web search for images. The drawing should be black and white and simple. As your skills improve, you may decide to include more detail but remember that too much detail can be confusing to a blind student.
Next, blow up the figure to about the size you would like it to be in braille. This should be fairly easy since we are experts at enlarging.
Now decisions have to be made as to whether it will be done as a silhouette or outline, or maybe a little of both. What needs to stand out? Focus on the general feeling of the piece. Ignore fine details that are simply visual.
Finally, the actual creation. I usually start at the top. If it is very bottom heavy, like my Pirate Ship, I will start at the bottom and move up. I find the topmost/bottommost element, decide where on the page I should start (gauging this from my printed icon as an example). Then begin to move up/down line by line.
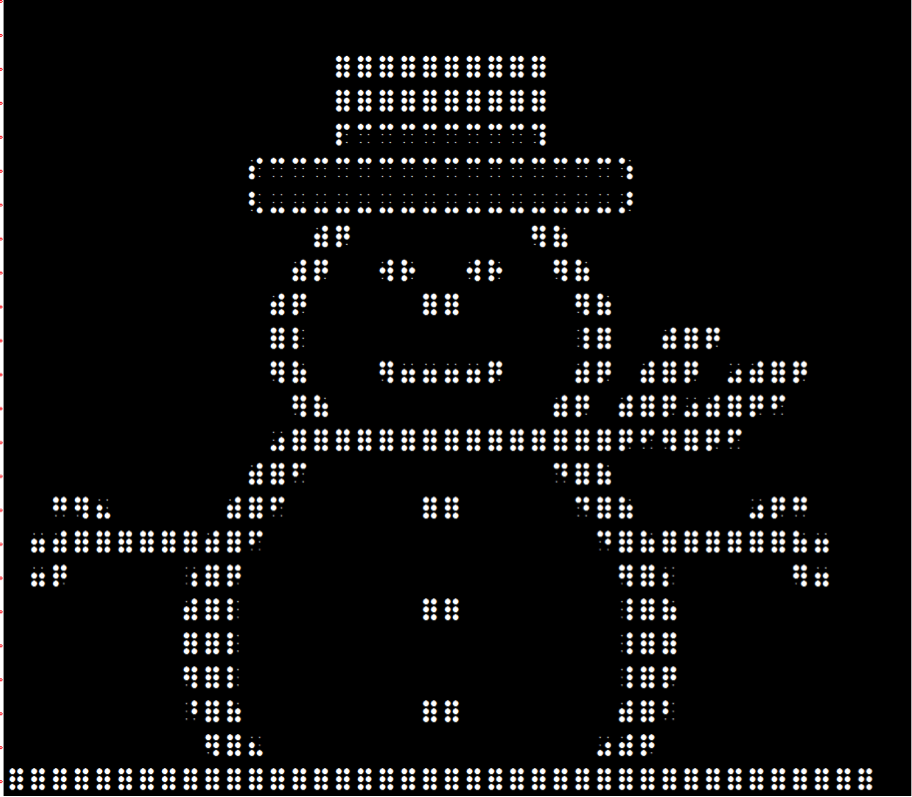
Step-by-Step Instructions to Create a Braille Design
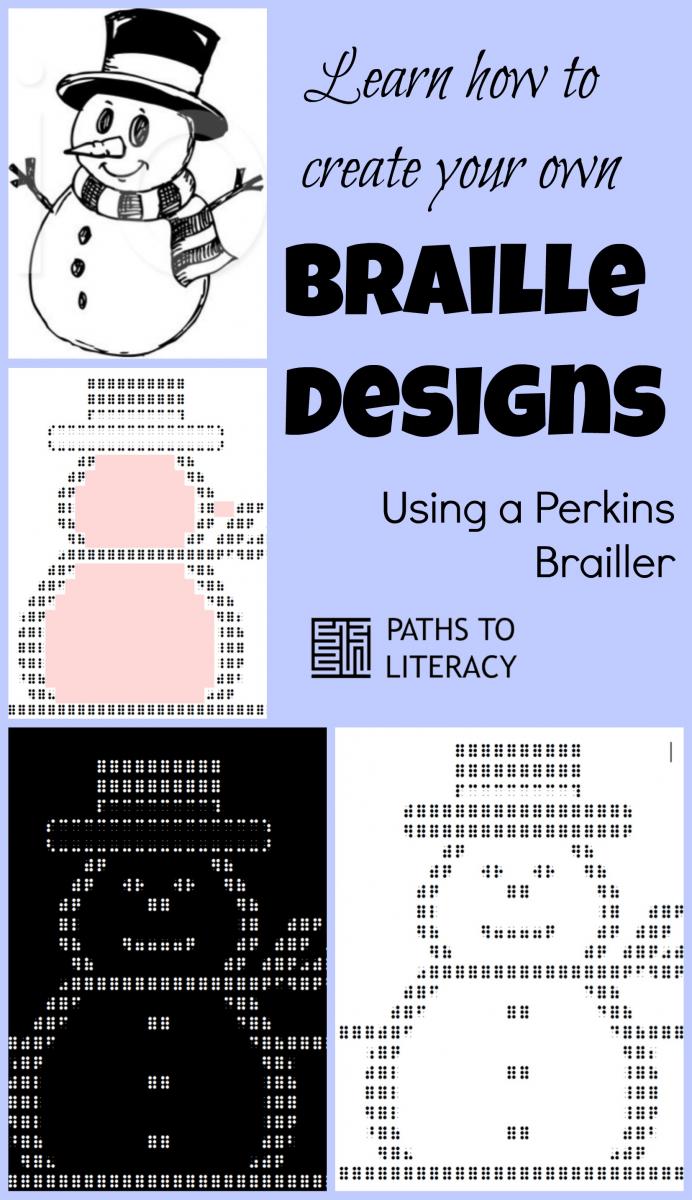
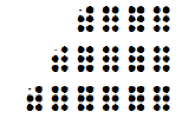
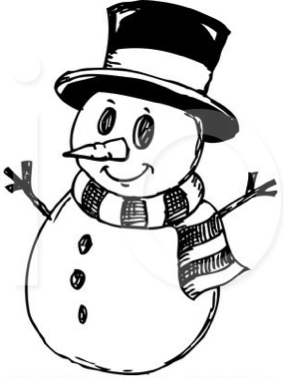 I’m going to start from scratch with a project that I was asked to think about, A SNOWMAN! I’ll go through the process with you.
1. Pick an image.
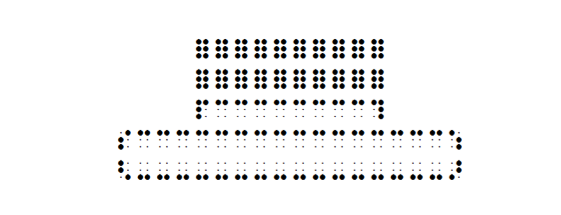
First I pick an image or icon. I like this cute one. Not too complicated, and it can be simplified as needed to make it easier!
(I’ll refer to dark places as filled in with braille, white will be braille lines.) I’ll make the hat dark with a white ribbon and dark underside. The Snowman himself will be white with nose, mouth, eyes, stick arms, and scarf will be made dark. The ground will be dark for a contrast.
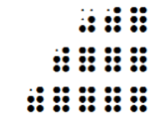
2. Prepare a copy that is the right size.
Next, I prepare a copy about the size I want it. Adjust the position to upright to make it easier.
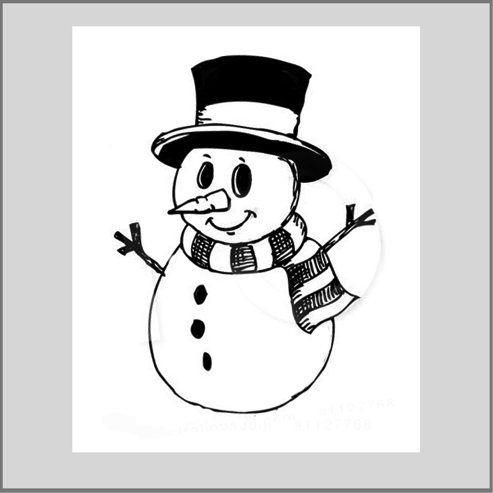
Notice that I left room for error. If he ends up a little bigger or smaller, it will be fine.
3. Technique: Creating Curves
Now let’s talk technique!
Boxes and straight lines are easy to create, however the curves make the challenge of a good Braille Art piece. I create solid curves by using several braille cell choices depending on the slope, “with”, “of”, “q”, “er” can be used for many solid curves. Add a cell or subtract a cell to keep the curve going. Like this:

To change the slope, try adding a “d”, “f”, “question mark”, or “simple close quote”, like this:
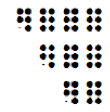
And now I start creating!
I’m going to start on line 3. I can always move him down if he looks too high on the page later.
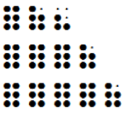
4. Figure out how to simplify the image.
Notice the simplification of the hat. The idea of the parts of the hat (the top, the ribbon, and the brim) is the most important thing.
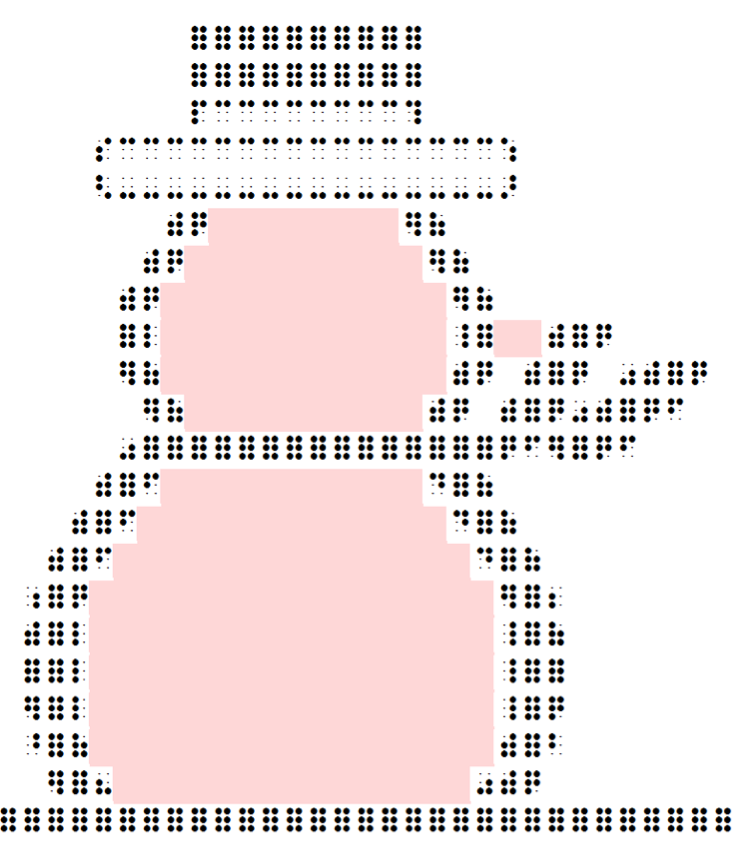
Then the main body. Notice that I decided to make a bold outline on the body. A last minute change, I decided that the scarf would be more recognizable if it were separated from the body.
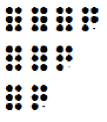
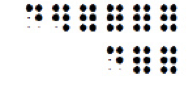
5. Add detail.
As I add in detail, I have to add in cells and erase spaces.
As I add the detail, the pink (missing cells) get in the way of seeing how something is really looking, so I highlight the whole picture and look at it as a negative.
Doing this, I see that I don’t like the carrot nose. It runs into the mouth. I can play with it or just make a coal nose.
6. Decide how to refine the drawing.
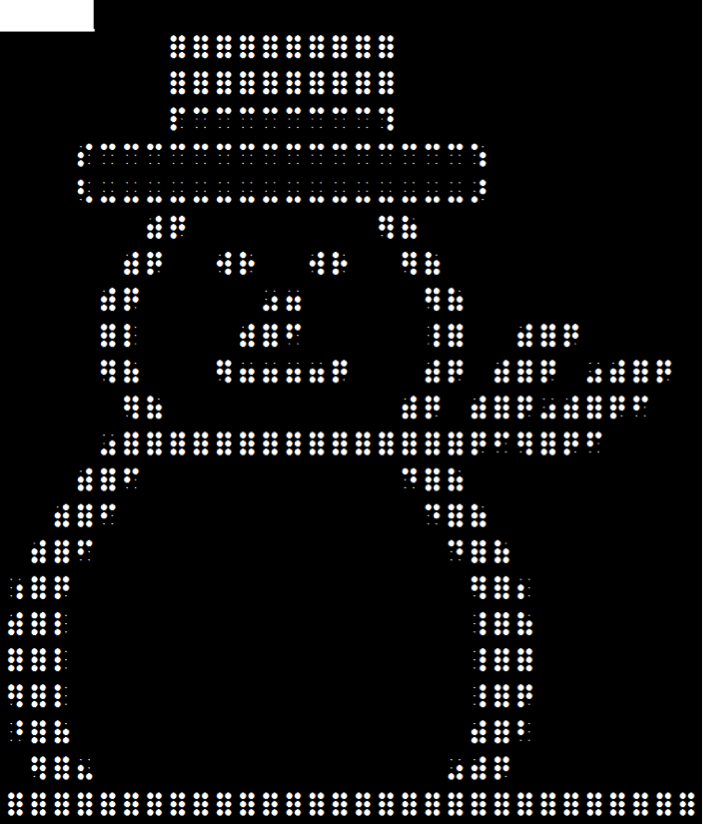
Hmmm, looks good to me! But I’m thinking that the brim of the hat needs to be solid. Minor change and …

Here is my finished work. Now I am ready to start looking at what I created to make the instructions for the project.
Enjoy creating your own to share with us!!!
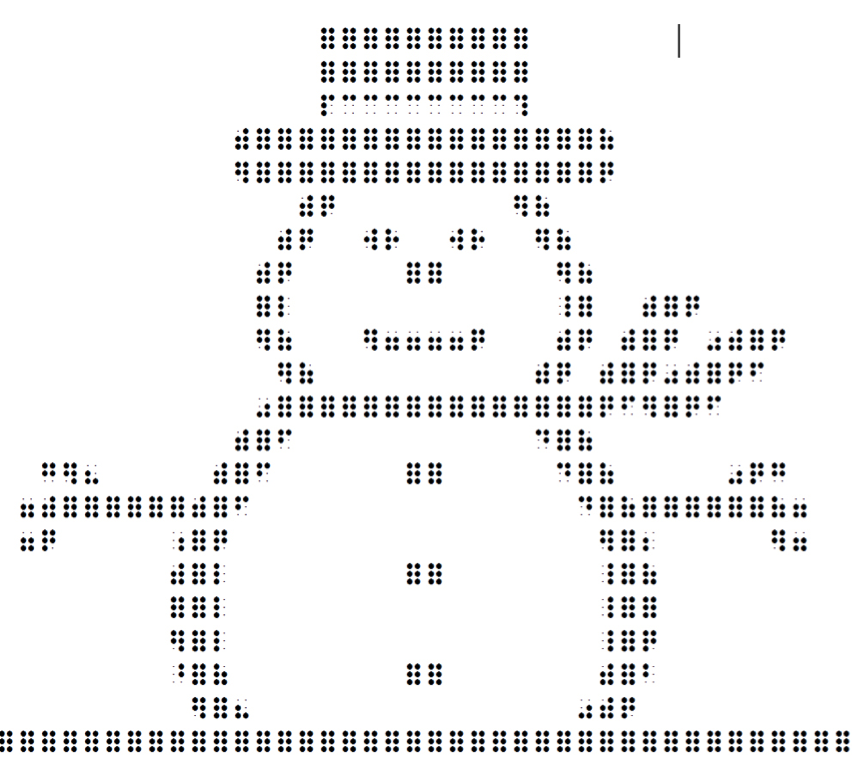
More braille drawings